The Story Behind the Photo:
February 2021: Water Drops
by Steve McKeen
©Steven McKeen
©Steven McKeen
My interest started with water drop photography while I attended a photography class at the college taught by Roger. I used glycerin to capture water drops on a twig. Fast forward to the present.
I first started using the manual mode to capture water drop collisions. I was fascinated with the results, but there was a very low capture rate and it was very time consuming. I looked for a reliable process and did a lot of reading to research how water drop collisions were captured. That is how I found the system I am now using.
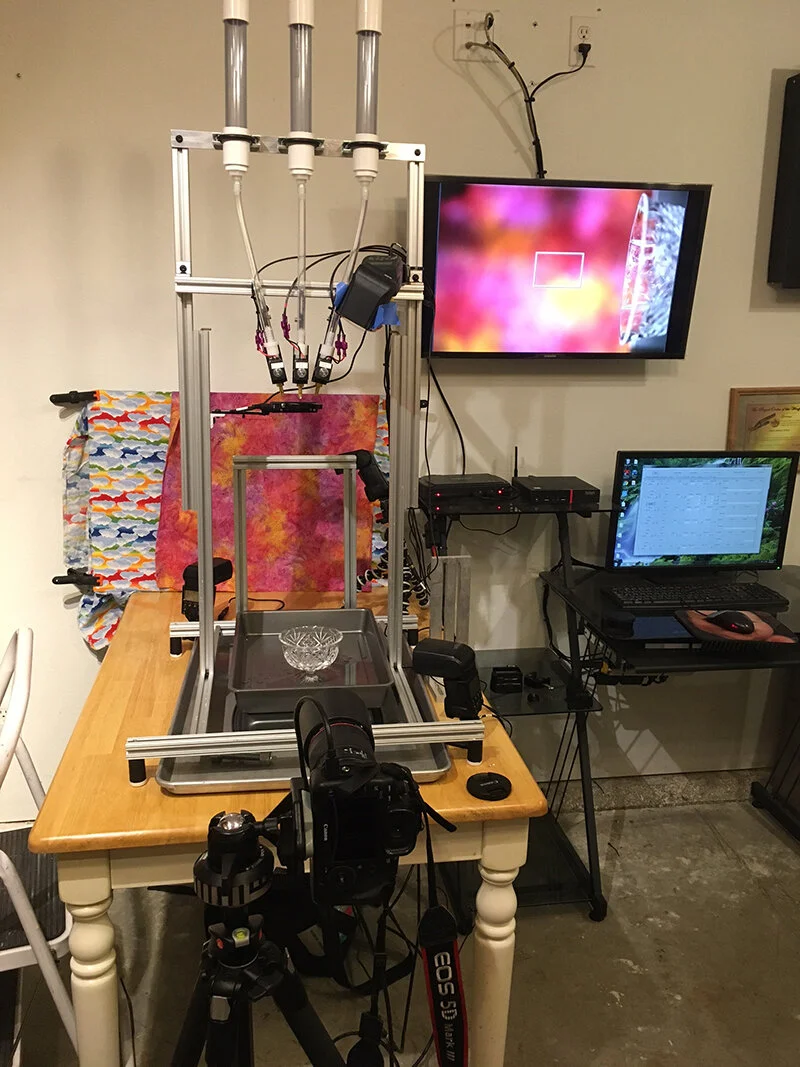
I now use a computer and program to control the water valves, timing, and number of drops, size of drops, flashes and camera shutter.
The additional basic items that need to be addressed are the following.
Height of the drop
Size of the base container for the drop
Lighting
Type of liquid used for the drop and the catch basin (base container)
Manual focus
Manual camera settings
Bulb mode
Darkened room (does not need to be totally dark). I can see my equipment and camera without additional lights.
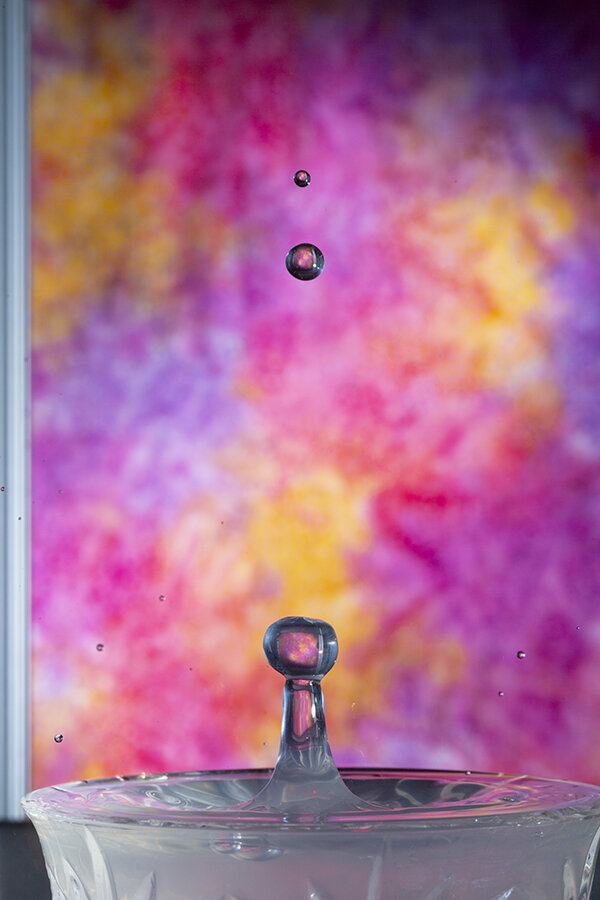
The SBtP image was made with the following settings.
3 sets of 2 water drops each
4 flashes – 2 facing the background, 1 directly overhead, 1 on the side of the drop zone.
The flashes were set on manual mode to 1/64 power
The camera was set to bulb mode (Controlled by the computer)
The liquid used was water. Gar Gum was added to give the water a thicker build. Dishwasher “Jet Dry” was added to the base water to let the water drop cut thru the water faster. Only a few drops were added.
The background was placed as far away as I could. This gives the out of focus effect. The background was a piece of cloth material with bright colors.
After the base container was filled with water, the computer, the camera and the flashes were all turned on, I take photos until I have the exposure correct. I then place an object (a large bolt and nut) directly under where the drop will fall. I activate the valve to make sure the bolt is directly under the water drop. I focus on the close side of the bolt. I have a 32 inch tv in my photo lab that I also use as a monitor so I can get a perfect focus. An alternate way of focusing is to use live view and use the magnify mode. It is extremely important to get the focus right since the photo will have to be cropped. After the initial focus, I don’t touch the camera or tripod. As long as nothing is moved, the focus will stay. I use a 100mm macro lens at F:16 and ISO 100.
The total time of the Water drop is less than ½ second. In order to capture the drop exactly where you want it, you will need the flash to freeze the action. The flash will need to be set at 1/64 or shorter. This gives a very short burst of light. Much faster than your camera will be able to perform. This is why we use blub mode. The flash acts as the shutter. I have the camera shutter open right before the start of the drop and close shortly after it is over.
That is the basics for the setup. Items that effects the water drop collision are pretty much everything. You will never get two of the same photos.
Now for the fun part. With everything turned on, I use a flashlight aimed at the drop zone and trigger the machine. I keep making adjustments until I can see collisions taking place. Once I see collisions, I start taking photos. Adjust, adjust and adjust. Just when you think you have that GREAT water drop, you find out that the collision was tilted the wrong way. The fun part about it is you never know what you will get. Considering that the collision only last for approximately ½ second, adjustments are very small to get the changes you are looking for. 2 milliseconds of a change might be just the change you need.
The following photos demonstrate what a very small change in a setting can do:
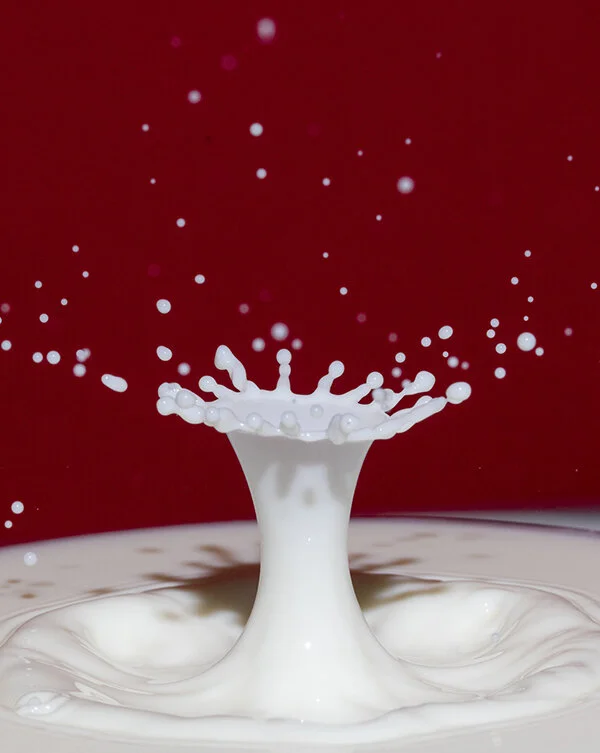
Lighting can have a dramatic effect on the water drop. Ways to change the lighting are placement, backdrop, filters, number of flashes and such. With water as a liquid, bouncing the flash off the backdrop will give the drop color. With milk, using filters and lighting the water drop will have a different effect. The photo I submitted had one flash on the side, which left part of the drop container with a shadow. This is what gave the black reflection on the main water drop and the round water drop above. In doing so, it gave the water drops defined edges. The crown water drop (shown below) had two flashes, one with a blue gel and one with a red gel. They were placed on each side of the water drop facing it. Another flash was overhead with a clear diffused flash. This caused the top of the crown and inside water drop to be clear. The reflection picked up the colors because it did not have a direct flash lighting it up. Lighting really affects your photos.
Examples of how lighting affects the water drop:
After you find the photos you want to share/display, you will need to clean up the extra drops/artifacts in the photo.
All of the above photos are drops of water or milk and a representation of the drops as they appeared when photographed. (No altering with the exception of removing unwanted artifacts, adjusting color from camera RAW and cropping.)
Water drop photography can be extremely rewarding when you get THE PHOTO!!
Have great time and enjoy the challenge.
Thank You – Steve McKeen


